GMSL Camera Setup with ACPI SSDT Overlay#
This guide describes how to enable GMSL cameras using an ACPI SSDT (Secondary System Description Table) overlay, and how to configure the camera media pipeline in user space. It covers the following cameras on the AAEON CEXD-INTRBL development kit:
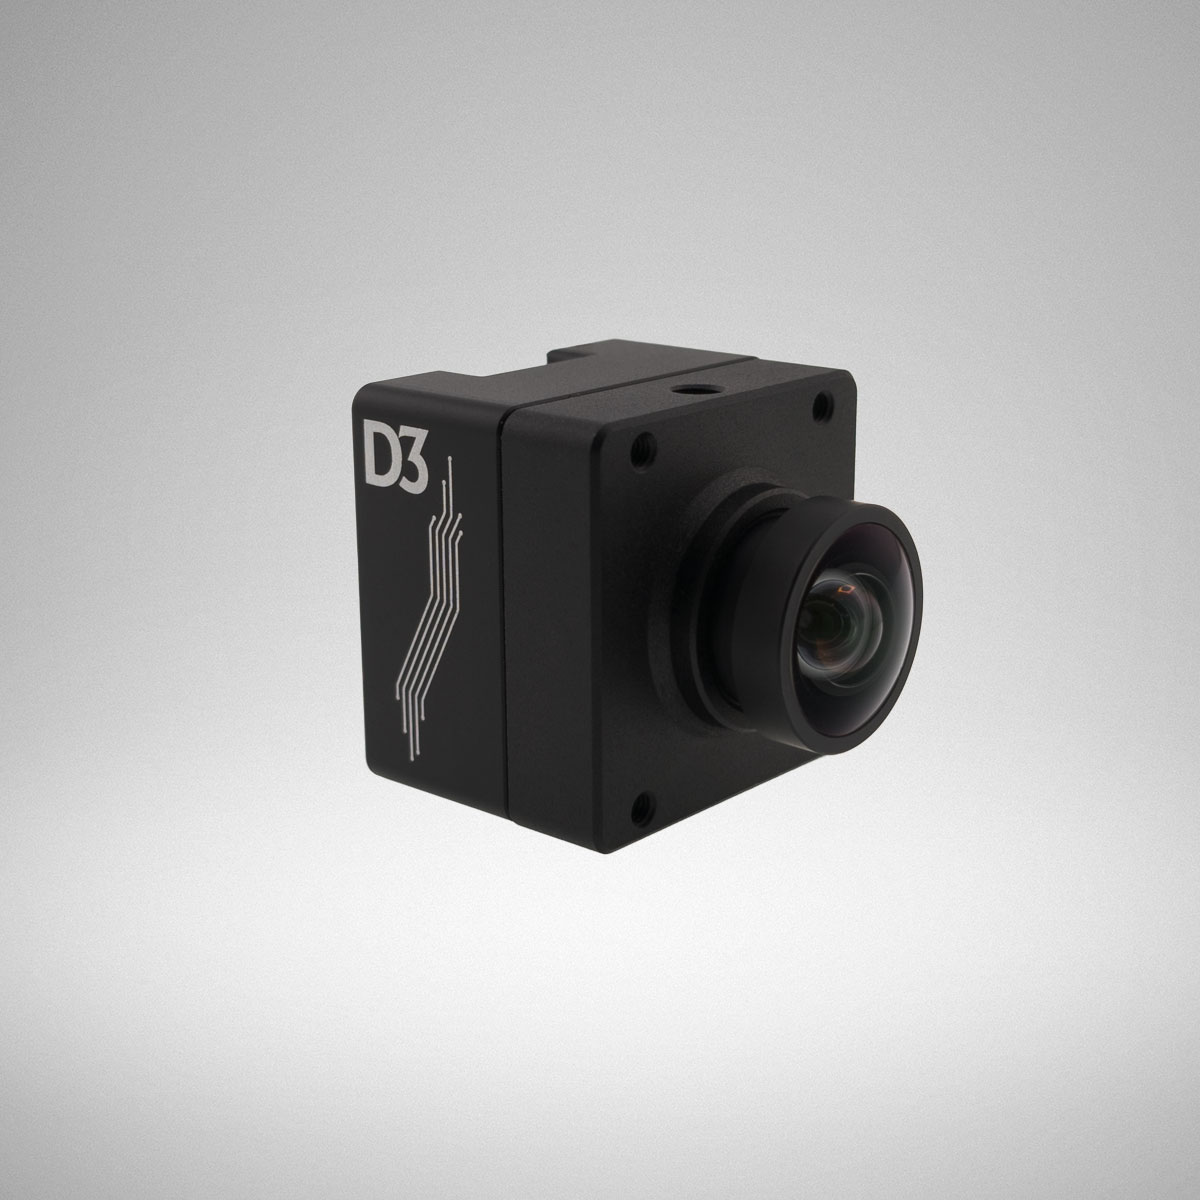
D3 Embedded ISX031 (2D, single YUV stream)
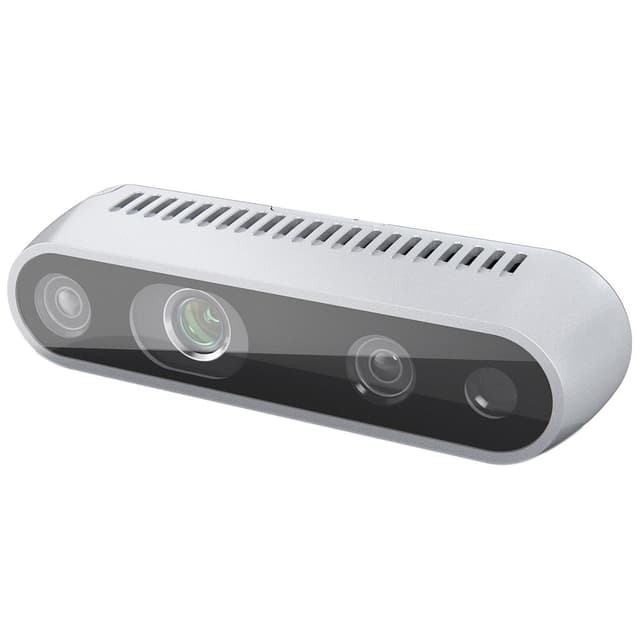
RealSense D457 (3D, Depth, RGB, IR and IMU streams)
With the SSDT overlay method, the deserializer, serializers and sensors are
described in an ACPI table that is loaded by GRUB as an early initrd at boot.
The kernel enumerates the cameras from this table and the maxim-serdes
drivers register them with the V4L2 framework. The overlay does not depend on
BIOS fields and supports mixing different sensor models on the same
deserializer.
Note
The I2C bus numbers assigned to the GMSL devices are dynamic with the SSDT
overlay method and can change on every boot. The media pipeline is therefore
built at runtime by the mc-setup.sh script from the ACPI paths of each
device, rather than from a static configuration.
Supported GMSL Cameras#
Image |
Camera |
Supported Development Kit |
Interface |
Type |
Sensor |
Vendor |
|---|---|---|---|---|---|---|
|
RealSense D457 |
AAEON CEXD-INTRBL |
GMSL |
Depth · Color |
OV9782 + D450 Depth |
|
|
D3 Embedded D3CMCXXX-115-084 |
AAEON CEXD-INTRBL |
GMSL |
Color |
ISX031 |
Prerequisites#
Complete the Getting Started guide, including the Intel APT repository setup.
Use the IPU7 platform kernel. The kernel must provide the
i2c_atrmodule (CONFIG_I2C_ATR), which is required by themaxim-serdesdrivers.media-ctlversion 1.30 or newer. Thev4l-utilspackage from the Intel APT repository meets this requirement:sudo apt-get install v4l-utils ffmpeg media-ctl --version
Step 1: Disable BIOS Camera Configuration#
BIOS camera settings create ACPI camera devices that conflict with the SSDT overlay. Disable all camera settings in the BIOS before loading the overlay.
On the AAEON CEXD-INTRBL, open the System IO menu in the BIOS and set
Camera1, Camera2 and Camera3 to Disabled. See the
CEXD-INTRBL GMSL guide
for screenshots of this menu.
Step 2: Connect the Cameras#
The AAEON CEXD-INTRBL has two 4-in-1 mini-FAKRA connectors, each connected to one MAX96724 deserializer over C-PHY:
Connector |
Deserializer ( |
MIPI Port |
I2C Bus |
|---|---|---|---|
Left |
|
0 |
I2C0 |
Right |
|
2 |
I2C1 |
Each connector has four GMSL links, labeled A to D, which map to
CH0 to CH3 in mc-setup.sh. The position of each link, viewed with
the connector key (^) at the top, depends on the board revision:
  Left (DES0)        Right (DES1)
   _________          _________
  |    ^    |        |    ^    |
  | (B) (C) |        | (B) (C) |
  |         |        |         |
  | (D) (A) |        | (D) (A) |
  | _ _ _ _ |        | _ _ _ _ |
   \_______/          \_______/
Link |
|
Left connector |
Right connector |
|---|---|---|---|
A |
|
Lower-right |
Lower-right |
B |
|
Upper-left |
Upper-left |
C |
|
Upper-right |
Upper-right |
D |
|
Lower-left |
Lower-left |
  Left (DES0)        Right (DES1)
   _________          _________
  |    ^    |        |    ^    |
  | (C) (B) |        | (D) (B) |
  |         |        |         |
  | (D) (A) |        | (C) (A) |
  | _ _ _ _ |        | _ _ _ _ |
   \_______/          \_______/
Link |
|
Left connector |
Right connector |
|---|---|---|---|
A |
|
Lower-right |
Lower-right |
B |
|
Upper-right |
Upper-right |
C |
|
Upper-left |
Lower-left |
D |
|
Lower-left |
Upper-left |
Connect the cameras to the links described by the overlay you select in Step 3:
Overlay rs_d457 describes four RealSense D457 cameras:
Deserializer |
Links |
|---|---|
|
A ( |
|
A ( |
Each D457 uses up to four streams. Connect at most two D457 cameras per deserializer.
Overlay d3_isx031 describes eight D3 Embedded ISX031 cameras:
Deserializer |
Links |
|---|---|
|
A ( |
|
A ( |
Warning
The overlay must match, or be a subset of, the cameras that are physically connected. If the overlay describes a camera that is not connected, or any link fails to probe, V4L2 sub-device registration fails and none of the cameras can stream.
Step 3: Install the Driver and Select a pre-canned SSDT Overlay#
Install the GMSL driver package:
sudo apt-get update
sudo apt-get install intel-mipi-gmsl-dkms
If the package is already installed, run the configuration dialog again with:
sudo dpkg-reconfigure intel-mipi-gmsl-dkms
Answer the configuration dialog as follows:
Code Name |
Intel Processor |
IPU Version |
Deserializer |
|---|---|---|---|
Panther Lake |
Intel® Core™ Ultra Series 3 Processors |
IPU7 |
|
Arrow Lake |
Intel® Core™ Ultra Series 2 Processors |
IPU6 |
|
Prompt |
Selection |
|---|---|
GMSL deserializer kernel driver |
|
IPU generation |
|
Target hardware board |
|
Camera sensor module |
|
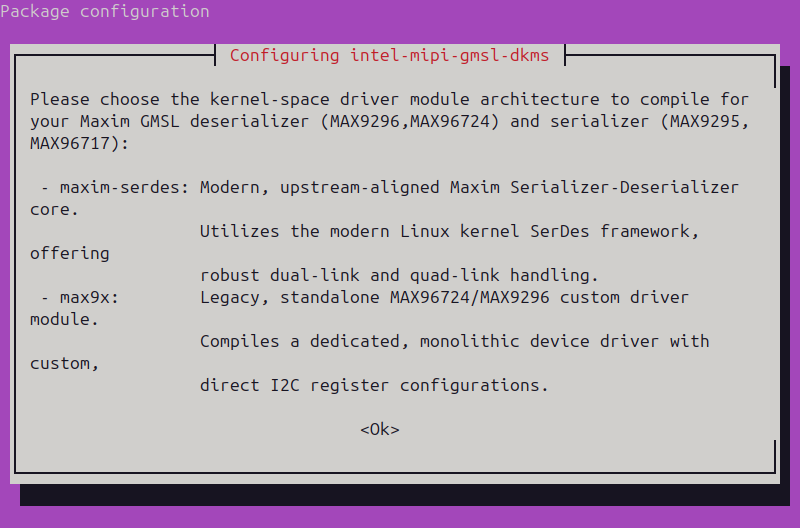
The dialog screens appear in the following order. The screenshots show the
selections for RealSense D457. Press Enter on <Ok> to continue to the next
screen.
Read the description of the deserializer kernel drivers.
Select
maxim-serdes.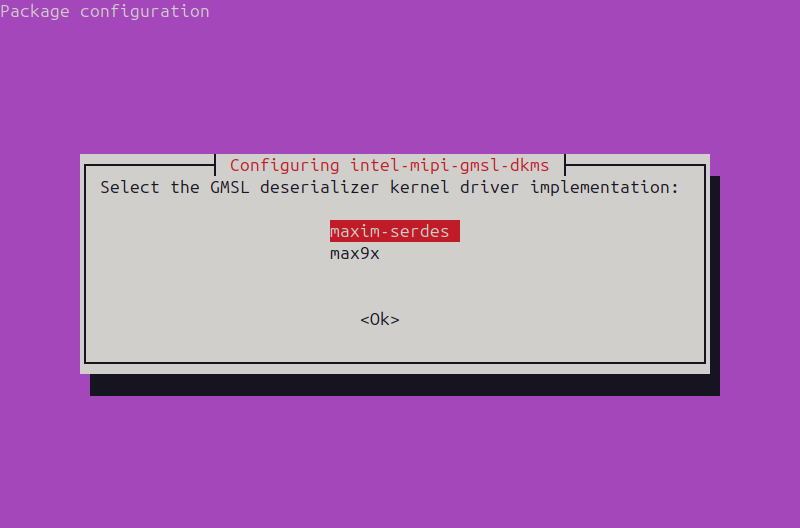
Read the description of the supported carrier boards.
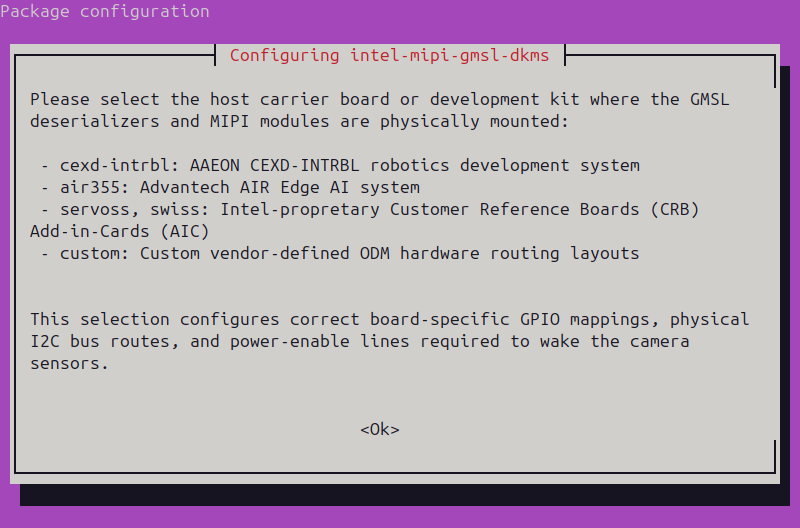
Select
max96724-cexd-intrbl.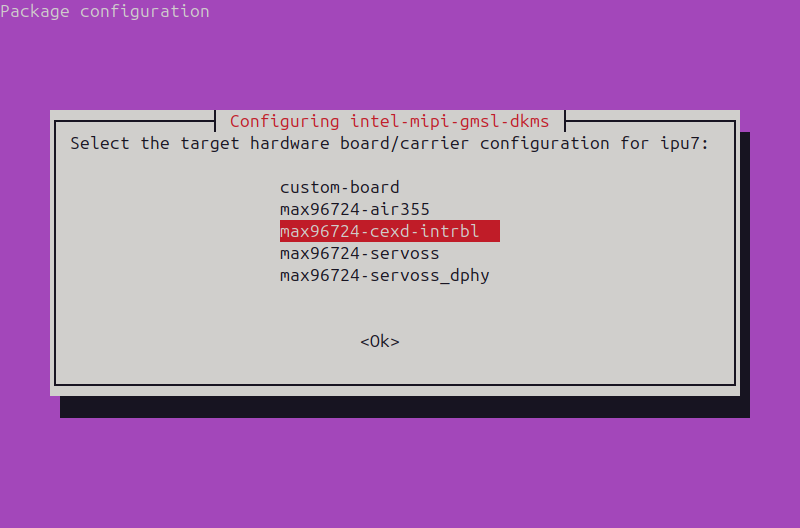
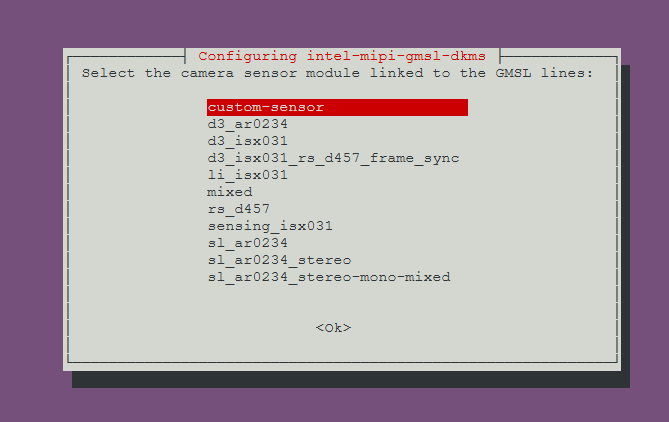
Read the description of the supported camera sensors.
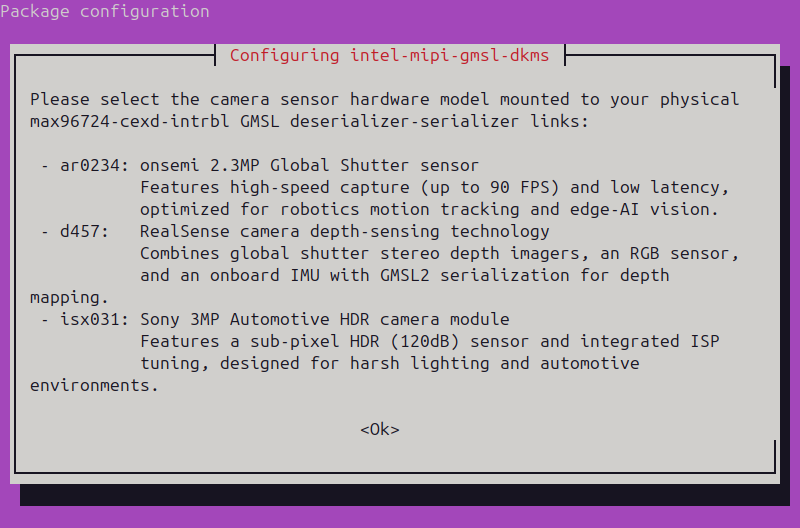
Select
rs_d457ord3_isx031.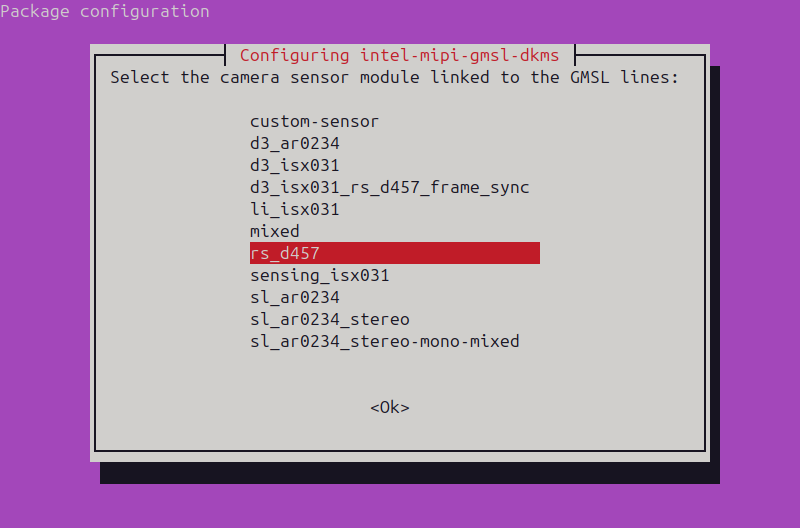
Confirm that the cameras are connected to the FAKRA links shown for the selected overlay.
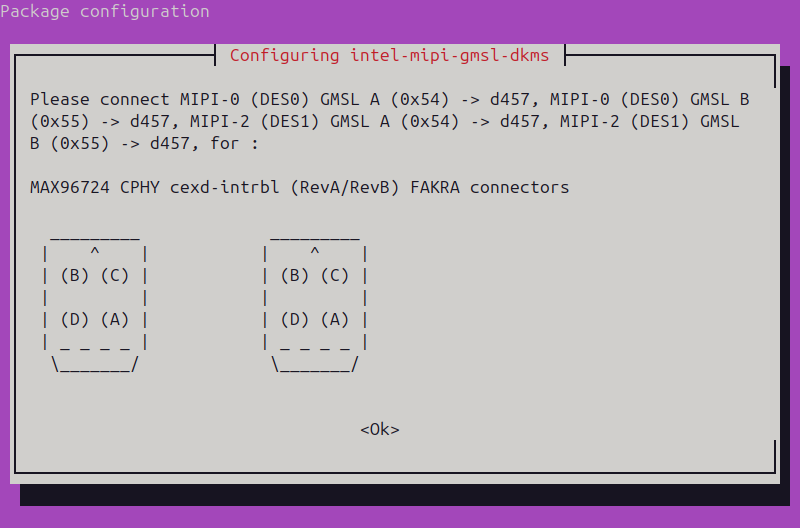
Selecting maxim-serdes enables the SSDT overlay method. After the sensor
selection, the dialog shows the FAKRA links that must be connected for the
chosen overlay. The package then:
Packs the prebuilt overlay from
/usr/share/camera/acpi/ipu7/into/boot/ipu7_max96724-cexd-intrbl_<sensor>_ssdt.img.Writes
GRUB_EARLY_INITRD_LINUX_CUSTOMto/etc/default/grub.d/ssdt.cfg.Runs
update-grub.
A reboot is required to load the overlay.
sudo reboot
Step 3b: Create your own custom the SSDT Overlay#
If custom-board or custom-sensor GMSL selection dialog is set, the admin user shall create and compileboard and sensor specific SSDT-overlay AML file from the package source :
Below an example of custom GMSL Camera isx031 from an exsting SSDT-overlay design template :
sudo apt-get install acpica-tools
apt source intel-mipi-gmsl-dkms
cd intel-mipi-gmsl-drivers-20260907
cp acpi/ipu7/max96724-cexd-intrbl_d3_isx031.asl acpi/ipu7/max96724-cexd-intrbl_d3_isx031-custom.asl
script/acpi/gen_ssdt.sh acpi/ipu7/max96724-cexd-intrbl_d3_isx031.asl
compile SSDT overlay from /usr/share/camera/acpi/ipu7/ into a custom /boot/img_ssdt.img.
Intel ACPI Component Architecture
ASL+ Optimizing Compiler/Disassembler version 20250807
Copyright (c) 2000 - 2025 Intel Corporation

ASL Input:     acpi/ipu7/max96724-cexd-intrbl_d3_isx031-custom.asl -   12002 bytes    248 keywords      0 source lines
AML Output:    acpi/ipu7/max96724-cexd-intrbl_d3_isx031-custom.aml -   13702 bytes     36 opcodes     212 named objects
Preprocessor:  acpi/ipu7/max96724-cexd-intrbl_d3_isx031-custom.i -  127894 bytes

Compilation successful. 0 Errors, 0 Warnings, 0 Remarks, 300 Optimizations
29 blocks
Successful generation of /tmp/img_ssdt.img
Successful copy of /tmp/img_ssdt.img to /boot
Update GRUB_EARLY_INITRD_LINUX_CUSTOM to /etc/default/grub.d/ssdt.cfg :
update-grub
Sourcing file `/etc/default/grub'
Sourcing file `/etc/default/grub.d/09_eci-user.cfg'
Sourcing file `/etc/default/grub.d/ssdt.cfg'
Generating grub configuration file ...
Found linux image: /boot/vmlinuz-7.0.0-38-generic
Found initrd image: /boot/img_ssdt.img /boot/initrd.img-7.0.0-38-generic
Found linux image: /boot/vmlinuz-7.0.0-34-generic
Found initrd image: /boot/img_ssdt.img /boot/initrd.img-7.0.0-34-generic
Found linux image: /boot/vmlinuz-6.17.0-40-generic
Found initrd image: /boot/img_ssdt.img /boot/initrd.img-6.17.0-40-generic
Found linux image: /boot/vmlinuz-6.17.0-35-generic
Found initrd image: /boot/img_ssdt.img /boot/initrd.img-6.17.0-35-generic
Found linux image: /boot/vmlinuz-6.11.0-17-generic
Found initrd image: /boot/img_ssdt.img /boot/initrd.img-6.11.0-17-generic
Found memtest86+ 64bit EFI image: /memtest86+x64.efi
Warning: os-prober will not be executed to detect other bootable partitions.
Systems on them will not be added to the GRUB boot configuration.
Check GRUB_DISABLE_OS_PROBER documentation entry.
Adding boot menu entry for UEFI Firmware Settings ...
done
A reboot is required to load the overlay.
sudo reboot
Step 4: Verify the SSDT Overlay and Drivers#
Confirm that the kernel loaded the overlay from the initrd:
sudo dmesg | grep SSDT
You should see output similar to:
ACPI: SSDT ACPI table found in initrd [kernel/firmware/acpi/max96724-cexd-intrbl_d3_isx031-custom.aml][0x143d]
ACPI: Table Upgrade: install [SSDT-      - IMG_IPU]
ACPI: SSDT 0x00000000678E6000 00143D (v02        IMG_IPU  20260513 INTL 20250404)
Confirm that the i2c_atr module is used by max_serdes:
lsmod | grep i2c_atr
i2c_atr 24576 1 max_serdes
Confirm that the deserializer, serializer and sensor entities are registered in the media graph:
media-ctl -p | grep -E "entity .*(max96724|max96717|DS5 mux|D4XX)"
Each D457 registers a max96717 serializer, a DS5 mux entity, and one
D4XX depth, D4XX rgb, D4XX ir and D4XX imu entity.
media-ctl -p | grep -E "entity .*(max96724|max96717|isx031)"
Each ISX031 registers a max96717 serializer and an isx031 entity.
If no camera entities are listed, check that all BIOS camera settings are disabled and that the connected cameras match the overlay.
Step 5: Configure the Media Pipeline#
The mc-setup.sh script discovers the cameras from ACPI and sysfs, then uses
media-ctl to program the routes and formats from each sensor through the
serializer, deserializer and IPU CSI-2 receiver to the capture video nodes.
A udev rule runs the script automatically when the cameras are enumerated at boot, which configures the default streams on every link:
Camera |
Default streams |
|---|---|
RealSense D457 |
Depth and RGB |
D3 Embedded ISX031 |
Single YUV stream |
Run the script again to print the current configuration, or to change the links, streams, resolution, format or frame rate:
sudo /usr/share/camera/acpi/mc-setup.sh
Command Syntax#
Each argument configures one link. Without arguments, the script configures all links with their default streams. Combine the following comma-separated tokens in each argument:
Token |
Description |
Example |
|---|---|---|
|
Deserializer index |
|
|
GMSL link on the deserializer, |
|
|
RealSense D457 only. Any of |
|
|
Resolution |
|
|
Media bus format |
|
|
Frame rate |
|
To configure each D457 stream individually, wrap the stream settings in
brackets, for example stream=[depth,res=848x480,fps=60],[rgb]. A stream
listed without settings keeps its current configuration. Quote arguments that
contain brackets to prevent shell globbing.
Note
Each MAX96724 deserializer supports a maximum of four streams in total across all of its links. For example, two D457 cameras with Depth and RGB use all four streams on one deserializer.
The script prints a configuration summary that maps each stream to a capture video node. Use these video nodes in the following steps. The numbers depend on the system and the selected streams.
Default streams on all links
sudo /usr/share/camera/acpi/mc-setup.sh
Configuration summary:
DES0 CH0        Sensor model    d4xx
                Stream          [depth]  1280x720   UYVY8_1X16    30.000 FPS -->  /dev/video0
                Stream          [rgb]    1280x800   YUYV8_1X16    30.000 FPS -->  /dev/video4
DES0 CH1        Sensor model    d4xx
                Stream          [depth]  1280x720   UYVY8_1X16    30.000 FPS -->  /dev/video1
                Stream          [rgb]    1280x800   YUYV8_1X16    30.000 FPS -->  /dev/video5
DES1 CH0        Sensor model    d4xx
                Stream          [depth]  1280x720   UYVY8_1X16    30.000 FPS -->  /dev/video16
                Stream          [rgb]    1280x800   YUYV8_1X16    30.000 FPS -->  /dev/video20
DES1 CH1        Sensor model    d4xx
                Stream          [depth]  1280x720   UYVY8_1X16    30.000 FPS -->  /dev/video17
                Stream          [rgb]    1280x800   YUYV8_1X16    30.000 FPS -->  /dev/video21
All four streams from one D457 for the RealSense SDK
The RealSense SDK expects the following formats:
Stream |
Format |
|---|---|
Depth |
|
RGB |
|
IR |
|
IMU |
|
sudo /usr/share/camera/acpi/mc-setup.sh \
  'des=0,link=0,stream=[depth,format=FIXED,res=1280x720,fps=30],[rgb,format=YUYV8_1X16,res=1280x800,fps=30],[ir,format=VYUY8_1X16,res=1280x720,fps=30],[imu,format=Y8_1X8,res=38x1,fps=400]'
Configuration summary:
DES0 CH0        Sensor model    d4xx
                Stream          [depth]  1280x720   UYVY8_1X16    30.000 FPS -->  /dev/video0
                Stream          [rgb]    1280x800   YUYV8_1X16    30.000 FPS -->  /dev/video4
                Stream          [ir]     1280x720   VYUY8_1X16    30.000 FPS -->  /dev/video6
                Stream          [imu]    38x1       Y8_1X8       400.000 FPS -->  /dev/video2
FIXED is routed as UYVY8_1X16 through the pipeline, while the video node
is configured as Z16 so that the RealSense SDK recognizes the Depth stream.
Different settings for two D457 cameras
sudo /usr/share/camera/acpi/mc-setup.sh \
  'des=0,link=0,stream=[depth,format=UYVY8_1X16,res=1280x720,fps=30],[rgb,format=YUYV8_1X16,res=1280x800,fps=30]' \
  'des=0,link=1,stream=[depth,format=UYVY8_1X16,res=640x480,fps=90],[rgb,format=YUYV8_1X16,res=424x240,fps=5]'
Configuration summary:
DES0 CH0        Sensor model    d4xx
                Stream          [depth]  1280x720   UYVY8_1X16    30.000 FPS -->  /dev/video0
                Stream          [rgb]    1280x800   YUYV8_1X16    30.000 FPS -->  /dev/video4
DES0 CH1        Sensor model    d4xx
                Stream          [depth]  640x480    UYVY8_1X16    90.000 FPS -->  /dev/video1
                Stream          [rgb]    424x240    YUYV8_1X16     5.000 FPS -->  /dev/video5
Supported configurations
Stream |
Format |
Resolution |
FPS |
|---|---|---|---|
Depth |
|
1280x720 |
30, 15, 5 |
848x480 |
90, 60, 30, 15, 5 |
||
848x100 |
100 |
||
640x480 |
90, 60, 30, 15, 5 |
||
848x360 |
90, 60, 30, 15, 5 |
||
480x270 |
90, 60, 30, 15, 5 |
||
424x240 |
90, 60, 30, 15, 5 |
||
256x144 |
90 |
||
RGB |
|
1280x800 |
30, 15, 10, 5 |
1280x720 |
30, 15, 10, 5 |
||
848x480 |
60, 30, 15, 5 |
||
640x480 |
60, 30, 15, 5 |
||
640x360 |
90, 60, 30, 15, 5 |
||
480x270 |
90, 60, 30, 15, 5 |
||
424x240 |
90, 60, 30, 15, 5 |
||
IR |
|
1280x720 |
30, 15, 5 |
848x480 |
90, 60, 30, 15, 5 |
||
640x480 |
90, 60, 30, 15, 5 |
||
640x360 |
90, 60, 30, 15, 5 |
||
480x270 |
90, 60, 30, 15, 5 |
||
424x240 |
90, 60, 30, 15, 5 |
||
|
1280x800 |
30, 15 |
|
IMU |
|
38x1 |
400, 200, 100, 50 |
When streaming Depth and IR from the same camera at the same time, configure both with the same resolution.
Default stream on all links
sudo /usr/share/camera/acpi/mc-setup.sh
Configuration summary:
DES0 CH0        Sensor model    isx031
                Stream          [single] 1920x1536  UYVY8_1X16    30.000 FPS -->  /dev/video0
DES0 CH1        Sensor model    isx031
                Stream          [single] 1920x1536  UYVY8_1X16    30.000 FPS -->  /dev/video1
DES0 CH2        Sensor model    isx031
                Stream          [single] 1920x1536  UYVY8_1X16    30.000 FPS -->  /dev/video2
DES0 CH3        Sensor model    isx031
                Stream          [single] 1920x1536  UYVY8_1X16    30.000 FPS -->  /dev/video3
DES1 CH0        Sensor model    isx031
                Stream          [single] 1920x1536  UYVY8_1X16    30.000 FPS -->  /dev/video16
...
Selected links on one deserializer
sudo /usr/share/camera/acpi/mc-setup.sh des=0,link=1 des=0,link=2
Configuration summary:
DES0 CH1        Sensor model    isx031
                Stream          [single] 1920x1536  UYVY8_1X16    30.000 FPS -->  /dev/video1
DES0 CH2        Sensor model    isx031
                Stream          [single] 1920x1536  UYVY8_1X16    30.000 FPS -->  /dev/video2
Change resolution and frame rate
sudo /usr/share/camera/acpi/mc-setup.sh des=0,link=0,res=1920x1080,fps=60
Configuration summary:
DES0 CH0        Sensor model    isx031
                Stream          [single] 1920x1080  UYVY8_1X16    60.000 FPS -->  /dev/video0
Supported configurations
Format |
Resolution |
FPS |
|---|---|---|
|
1920x1536 |
60, 30 |
1920x1080 |
60, 30 |
|
1280x720 |
30 |
Step 6: Create RealSense Symlinks#
The RealSense SDK locates D457 cameras through /dev/video-rs-* symlinks.
A udev rule creates them at boot. After you change the pipeline with
mc-setup.sh, recreate the symlinks:
sudo /usr/share/camera/acpi/upstream-rs-enum.sh
ls -l /dev/video-rs-*
Two types of symlinks are created for each enabled stream, where <type>
is depth, color, ir or imu, and <index> identifies the camera:
Symlink |
Target |
Example |
|---|---|---|
|
Capture video node |
|
|
Sensor sub-device used for camera controls |
|
The capture video node targets match the mc-setup.sh configuration
summary.
This step is not required for D3 Embedded ISX031 cameras. Use the video
nodes from the mc-setup.sh configuration summary directly.
Step 7: Verify Streaming#
Replace /dev/videoN with a video node from the mc-setup.sh configuration
summary. The resolution, format and frame rate must match the configured
pipeline, otherwise streaming fails to start.
Stream with v4l2-ctl#
Stream 150 frames and report the frame rate:
v4l2-ctl -d /dev/videoN --stream-mmap --stream-count=150
You should see output similar to:
<<<<<<<<<<<<<<<<<<<<<<<<<<<<<<< 29.99 fps
<<<<<<<<<<<<<<<<<<<<<<<<<<<< 29.99 fps
<<<<<<<<<<<<<<<<<<<<<<<<<<<< 29.99 fps
<<<<<<<<<<<<<<<<<<<<<<<<<<<< 29.99 fps
<<<<<<<<<<<<<<<<<<<<<<<<<<<< 29.99 fps
Capture a Live Image#
Capture a single frame from the RGB stream with ffmpeg and view it:
ffmpeg -f v4l2 -i /dev/video-rs-color-0 -frames:v 1 frame.jpg
xdg-open frame.jpg
Or view the live RGB stream with ffplay:
ffplay -f v4l2 -i /dev/video-rs-color-0
Capture a single frame with ffmpeg and view it:
ffmpeg -f v4l2 -i /dev/videoN -frames:v 1 frame.jpg
xdg-open frame.jpg
Or view the live video stream with ffplay:
ffplay -f v4l2 -i /dev/videoN
Stream with GStreamer#
Install the GStreamer tools and plugins:
sudo apt-get install gstreamer1.0-tools gstreamer1.0-plugins-good gstreamer1.0-gl
# Depth (UYVY8_1X16)
gst-launch-1.0 v4l2src device=/dev/videoN ! 'video/x-raw,format=UYVY,width=1280,height=720,framerate=30/1' ! glimagesink

# RGB (YUYV8_1X16)
gst-launch-1.0 v4l2src device=/dev/videoN ! 'video/x-raw,format=YUY2,width=1280,height=800,framerate=30/1' ! glimagesink

# IR (Y8_1X8)
gst-launch-1.0 v4l2src device=/dev/videoN ! 'video/x-raw,format=GRAY8,width=1280,height=720,framerate=30/1' ! glimagesink
The IMU stream is not supported by v4l2src. The Depth stream contains raw
16-bit depth data and is displayed as an unconverted image.
gst-launch-1.0 v4l2src device=/dev/videoN ! 'video/x-raw,format=UYVY,width=1920,height=1536,framerate=30/1' ! glimagesink
Known Limitations#
RealSense D457: The RGB stream can only be started once if no Depth stream is configured and running. To restart the RGB stream repeatedly, configure the Depth stream with
mc-setup.sh, then start and stop the Depth stream before starting any other stream.RealSense D457: Some video nodes are shared between links. The IR stream of one link can use the same video node as the RGB stream of another link, and the IMU stream can use the same video node as a Depth stream. Do not enable streams that share a video node at the same time. Check the
mc-setup.shconfiguration summary for conflicts.RealSense D457: If the camera reports an unrecoverable I2C error (
-121), rebooting does not recover it. Power cycle the camera.
Next Steps#
Use OpenVINO™ to stream GMSL video data into a YOLO-based computer vision sample: OpenVINO™ RealSense AI Demo
Use ROS 2 to ingest camera frames for use in a ROS-powered application: RealSense ROS2 Node
sudo /usr/share/camera/ipu_max9x_bind.sh
Step 4: Verify Camera#
Verify the camera(s) are available in /dev/video:
ls -la /dev/video-rs-*
You should see output similar to:
lrwxrwxrwx 1 root root 12 Aug 10 16:39 /dev/video-rs-color-10 -> /dev/video35
lrwxrwxrwx 1 root root 12 Aug 10 16:39 /dev/video-rs-depth-10 -> /dev/video33
lrwxrwxrwx 1 root root 12 Aug 10 16:39 /dev/video-rs-imu-10 -> /dev/video45
lrwxrwxrwx 1 root root 12 Aug 10 16:39 /dev/video-rs-ir-10 -> /dev/video44
Verify the camera(s) are available in /dev/video:
ls -la /dev/video*
You should see output similar to:
lrwxrwxrwx 1 root root 11 Jul 14 15:23 /dev/video-isx031-a-0 -> /dev/video0
Step 5: Test Camera Data#
Confirm that you can query camera capabilities using v4l2-ctl, and stream frame data. Your bound device might use a different label then what is shown:
sudo v4l2-ctl -d /dev/video-rs-color-10 --stream-mmap --verbose
sudo v4l2-ctl -d /dev/video-isx031-1-0 --stream-mmap --verbose
You should see output similar to:
VIDIOC_QUERYCAP: ok
                VIDIOC_REQBUFS returned 0 (Success)
                VIDIOC_CREATE_BUFS returned 0 (Success)
                VIDIOC_QUERYBUF returned 0 (Success)
                VIDIOC_QUERYBUF returned 0 (Success)
                VIDIOC_QUERYBUF returned 0 (Success)
                VIDIOC_QUERYBUF returned 0 (Success)
                VIDIOC_G_FMT returned 0 (Success)
                VIDIOC_QBUF returned 0 (Success)
                VIDIOC_QBUF returned 0 (Success)
                VIDIOC_QBUF returned 0 (Success)
                VIDIOC_QBUF returned 0 (Success)
                VIDIOC_STREAMON returned 0 (Success)
cap dqbuf: 0 seq:      0 bytesused: 614400 ts: 294.387553 field: None (ts-monotonic, ts-src-eof)
cap dqbuf: 1 seq:      1 bytesused: 614400 ts: 294.420904 delta: 33.351 ms field: None (ts-monotonic, ts-src-eof)
cap dqbuf: 2 seq:      2 bytesused: 614400 ts: 294.454255 delta: 33.351 ms field: None (ts-monotonic, ts-src-eof)
cap dqbuf: 3 seq:      3 bytesused: 614400 ts: 294.487605 delta: 33.350 ms field: None (ts-monotonic, ts-src-eof)
cap dqbuf: 0 seq:      4 bytesused: 614400 ts: 294.520956 delta: 33.351 ms fps: 29.98 field: None (ts-monotonic, ts-src-eof)
cap dqbuf: 1 seq:      5 bytesused: 614400 ts: 294.554306 delta: 33.350 ms fps: 29.98 field: None (ts-monotonic, ts-src-eof)
cap dqbuf: 2 seq:      6 bytesused: 614400 ts: 294.587657 delta: 33.351 ms fps: 29.98 field: None (ts-monotonic, ts-src-eof)
cap dqbuf: 3 seq:      7 bytesused: 614400 ts: 294.621007 delta: 33.350 ms fps: 29.98 field: None (ts-monotonic, ts-src-eof)
cap dqbuf: 0 seq:      8 bytesused: 614400 ts: 294.654358 delta: 33.351 ms fps: 29.98 field: None (ts-monotonic, ts-src-eof)
Step 6: Capture a Live Image#
Your camera is now setup. This is a good chance to fetch a live image from your camera. You can use ffmpeg to fetch a frame or display a live vide.
Capture a single frame with ffmpeg and view it:
ffmpeg -f v4l2 -i /dev/video-rs-color-10 -frames:v 1 frame.jpg
xdg-open frame.jpg
Or view the live video stream with ffplay:
ffplay -f v4l2 -i /dev/video-rs-color-10
Alternatively, capture a single frame with ffmpeg and view it:
ffmpeg -f v4l2 -i /dev/video-isx031-a-0 -frames:v 1 frame.jpg
xdg-open frame.jpg
Or view the live video stream with ffplay:
ffplay -f v4l2 -i /dev/video-isx031-a-0
Next Steps#
Now that your GMSL camera is properly connected, you can test out using it with various samples or immediately use in your robotics solution:
Use OpenVINO to stream GMSL video data into a YOLO-based computer vision sample: OpenVINO RealSense AI Demo
Use ROS 2 to ingest camera frames for use in a ROS-powered application: RealSense ROS2 Node